
Kubernetes is the leading managed container orchestration platform preferred by customers deploying microservices-based architectures in the cloud. Azure Kubernetes Service offers Kubernetes as a managed service, where the container orchestration platform is handled by Azure, enabling customers to focus on the developments of applications. Then how does AKS meet Kubernetes storage demands?
Containers are stateless, which means data is not stored locally—these containers depend on attached persistent volumes to handle the data lifecycle. This blog will walk through the steps required for provisioning persistent volumes and configuring them to be used by containers in Azure Kubernetes Service clusters.
Contents
- 1 What is Persistent Storage?
- 2 Provision Persistent Storage Using Azure Disks
- 3 How AKS Uses Azure Disk Storage Classes
- 4 Limitations of Built-in Classes
- 5 Creating Custom Storage Classes
- 6 Create Persistent Volume Claim and Persistent Volume
- 7 Attach a Persistent Volume to AKS
- 8 Check Volume mount in your pod
What is Persistent Storage?
Persistent Storage is a mechanism to store data outside the lifecycle of a container or application, ensuring that critical information (like databases, user uploads, or configuration files) persists even if the container restarts, crashes, or is replaced. It’s essential for stateful applications (e.g., databases, CMS) that require data durability.
By default, the storage associated with pods is deleted when the pod lifecycle ends. For stateful applications, however, storage is expected to be persistent so that the data can remain available every time the pods gets recreated in the cluster. Container persistent storage in a Kubernetes cluster is provisioned using the PersistentVolume subsystem, which provides PersistentVolume and PersistentVolumeClaim API resources.
The PersistentVolumeClaim requests for a specific storage class, say Azure disks or Azure Files, and the underlying storage resource gets provisioned. This PersistentVolumeClaim is referenced in the pod definition so that the provisioned storage is mounted to the pod. In this way the PersistentVolume is linked to the PersistentVolumeClaim whenever the provisioned storage is mounted to the pod requesting the resource.
Note: The following steps will assume that the AKS cluster is already provisioned and that the administrator has access to execute the commands listed in this blog.
Provision Persistent Storage Using Azure Disks
There are four major steps in creating and attaching persistent storage using Azure disks in Azure Kubernetes Service.
1. Define/Create of storage class.
2. Configuration of persistent volume claim (PVC) that references of storage class.
3. Create the persistent volume claim and provision the volume.
4. Reference the PVC in the Pod specification to attach the Azure Disk ie., Attaching the provisioned volume to the pod by referencing the specific pod in the pod definition file.’
Let’s explore this process in detail with sample configuration files.
How AKS Uses Azure Disk Storage Classes
Azure Kubernetes Service (AKS) simplifies persistent storage management by offering two pre-configured storage classes for Azure Disks: default and managed-premium. These classes let teams provision storage tailored to workload requirements while abstracting backend complexity. Here’s how they work and where they shine—or fall short.
- Built-in Storage Classes
- default (Standard HDD)
default(Standard HDD)- Backend: Relies on cost-effective Azure Standard HDD storage.
- Use Case: Ideal for non-critical workloads like backups, logs, or dev/test environments where high throughput isn’t a priority.
managed-premium(Premium SSD)- Backend: Leverages Azure Premium SSD for low latency and high IOPS.
- Use Case: Suited for production workloads (e.g., databases, transactional apps) demanding consistent performance and faster data access.
Limitations of Built-in Classes
While convenient, the pre-built storage classes come with constraints:
No Post-Provisioning Resizing: Once a volume is created, you can’t expand its size—a hurdle for growing datasets or scaling applications.
Fixed Configuration: Default settings (e.g., performance tiers, redundancy) may not align with specialized needs.
Default: This storage class uses the standard Azure storage which leverages HDDs in the backend.
Creating Custom Storage Classes
In this section we’ll show you how users can create custom storage classes to suit their specific requirements.
1. Make Ready of StorageClass YAML
Connect to the AKS cluster from your management tool of choice (here i used powershell/CMD to connect the cluster using kubectl). For this demonstration we will be using Azure CL. From the Azure CLI, save the following manifest as storage-class.yaml
kind: StorageClass
apiVersion: storage.k8s.io/v1
metadata:
  name: managed-standard-custom
provisioner: disk.csi.azure.com
reclaimPolicy: retain
allowVolumeExpansion: true
parameters:
  storageaccounttype: Premium_LRS
  kind: Managed
This file can be used to create a storage class that uses Premium_LRS managed disks. The reclaimPolicy is set to retain so that the persistent volume is not deleted even if the pod to which it is attached gets deleted. With the parameter allowVolumeExpansion set to true, the volume can now be resized even after provisioning.
| Provisioner | Storage Type | Recommended Use | Notes |
|---|---|---|---|
| disk.csi.azure.com | Azure Managed Disks (Block Storage) | High-performance workloads requiring dedicated block storage on a single node | CSI-based; supports dynamic provisioning, volume expansion, and advanced features. Recommended for new deployments. :contentReference[oaicite:0]{index=0} |
| kubernetes.io/azure-disk (deprecated) | Azure Managed Disks (Block Storage) | Legacy setups using in-tree drivers | Deprecated in favor of the CSI-based disk.csi.azure.com provisioner. |
| file.csi.azure.com | Azure Files (File Storage) | Workloads needing shared storage (ReadWriteMany), such as content management or shared configuration files | CSI-based; supports SMB or NFS file shares with dynamic provisioning. :contentReference[oaicite:1]{index=1} |
| kubernetes.io/azure-file (deprecated) | Azure Files (File Storage) | Legacy deployments requiring shared file storage | Deprecated in favor of the CSI-based file.csi.azure.com provisioner. |
| azureblob-csi | Azure Blob Storage (Object Storage mounted as a filesystem) | Workloads that use large unstructured datasets, such as logs or archival data | Enables mounting of Blob storage via CSI as a filesystem (using protocols like NFS or BlobFuse). Suitable for applications that do not require block storage. |
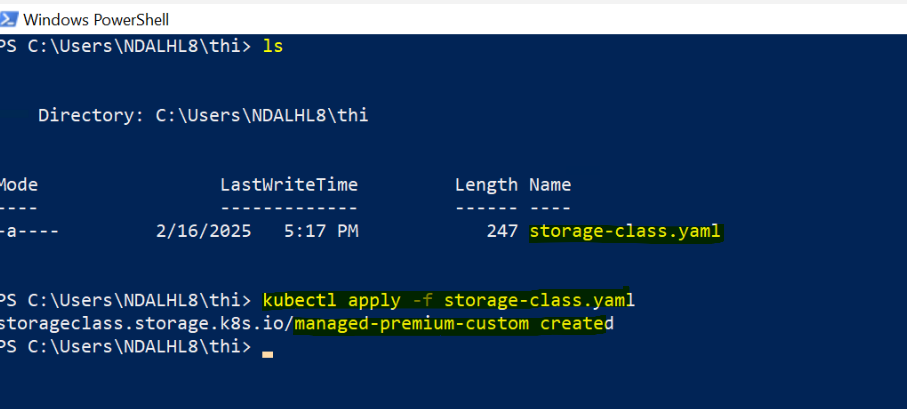
2. Apply the yaml file using the following command
$ kubectl apply -f storage-class.yaml
Upon successful execution, you will get a message that the storage class has been created.
Create Persistent Volume Claim and Persistent Volume
The next step is to create a persistent volume claim (PVC), which uses the storage class defined in the above to provision an Azure disk as a persistent volume.
1. Create custom-pvc.yaml file in the Azure CLI window
Create the PVC creation YAML as shown below,
The PVC will request for an Azure disk of 10 GB with accessmode as ReadWriteOnce. That means only one node can mount the volume as read-write.
kind: PersistentVolumeClaim
apiVersion: v1
metadata:
  name: custom-pvc
  namespace: default
spec:
  accessModes:
    - ReadWriteOnce
  resources:
    requests:
      storage: 10Gi
  storageClassName: managed-standard-custom
volumeMode: Filesystem| Access Mode | Description |
|---|---|
| ReadWriteOnce | The volume can be mounted as read-write by a single node. It can allow multiple pods to access it when running on the same node. |
| ReadOnlyMany | The volume can be mounted as read-only by many nodes. |
| ReadWriteMany | The volume can be mounted as read-write by many nodes. |
| ReadWriteOncePod | FEATURE STATE: Kubernetes v1.29 [stable] The volume can be mounted as read-write by a single Pod. This ensures that only one pod across the whole cluster can read or write to the PVC. |
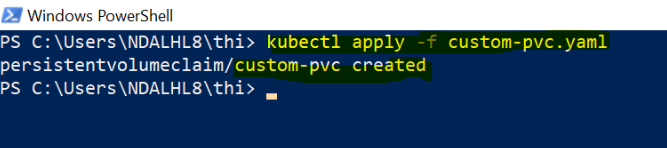
2. To create the volume itself, run the following command:
kubectl apply -f custom-pvc.yaml
On successful execution you will see a message that the persistent volume claim has been created.
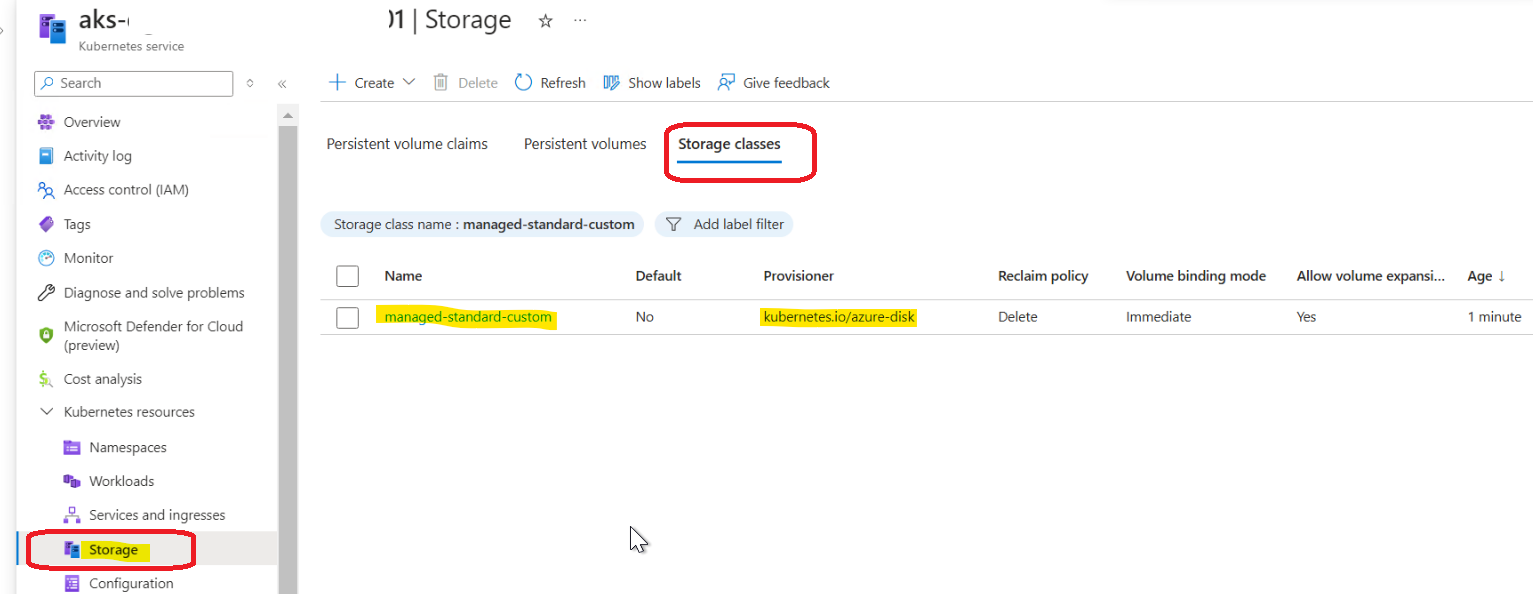
After creation, the provisioned volume can also be seen from the Azure portal. Browse to the resource group where the AKS nodes are created to find the newly provisioned disk listed there.
As highlighted in yellow, you can able to view Persistent Volume has created with name of “pvc-ae14b4f9-68d5-4aed-baf3-6addfe4e8b3d”
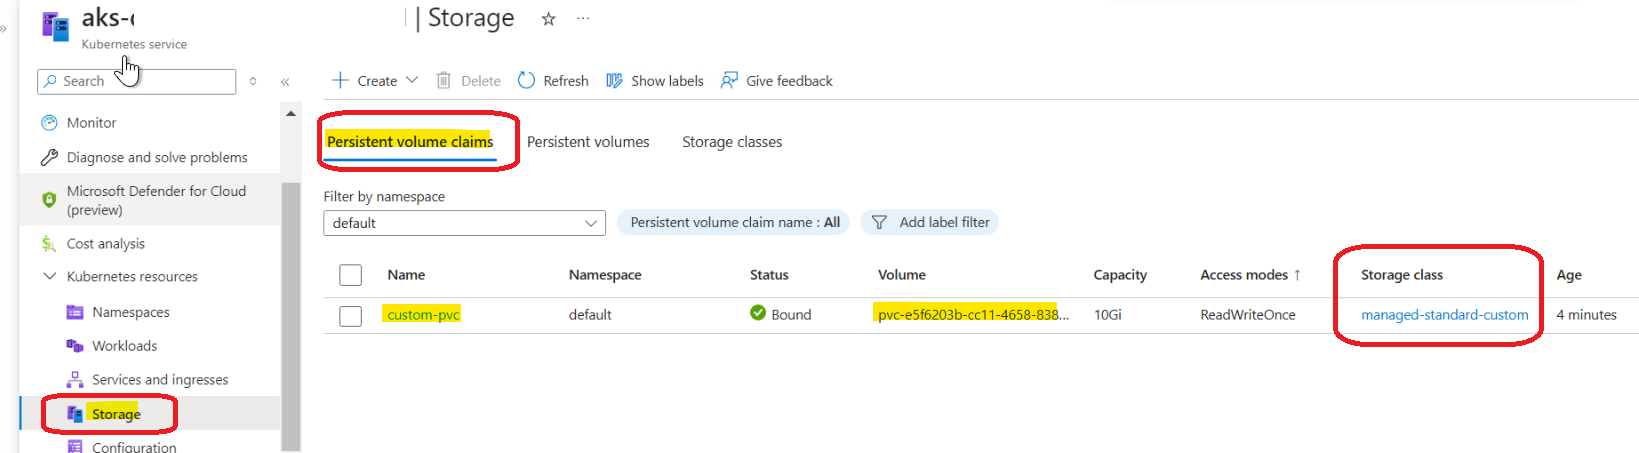
Once PVC is create successfully (status is bound) then the Persistent volume will create automatically and mapped to the PVC (refer above and below image)

And you can also verify disk with name of Persistent Volume by searching in the Azure portal as shown in below, where our mount data will be stored.

You can also run the following command to list the pvc status. It will be listed as “bound” to the created persistent volume:
You can also get all the PVC in your cluster, you can use kubectl get pvc

Attach a Persistent Volume to AKS
After creating the persistent volume claim and the Azure disk, it can be attached to a new pod by referencing the name of the persistent volume claim in the deployment or pod yaml.
1. Create file Nginx.yaml with the following content
apiVersion: apps/v1
kind: Deployment
metadata:
  name: nginx
spec:
  replicas: 1
  selector:
    matchLabels:
      app: nginx
  template:
    metadata:
      labels:
        app: nginx
    spec:
      restartPolicy: Always
      containers:
        - name:  nginx
          image: crdgtlshared02.azurecr.io/nginx:latest
          volumeMounts:
            - name: volume
              mountPath: /tmp/
      volumes:
        - name: volume
          persistentVolumeClaim:
            claimName: custom-pvc
      nodeSelector:
        kubernetes.azure.com/agentpool: userlnxpool
        kubernetes.azure.com/mode: user
        kubernetes.io/os: linux
The volume is mounted at /tmp/ as specified by the mountpath parameter.
Note that the image for the container is taken from my Azure container registry. Alternatively, it can also be downloaded from the Azure container registry.
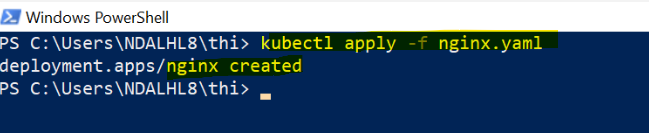
2. Next, create the pod using the following command:
kubectl apply -f Nginx.yaml
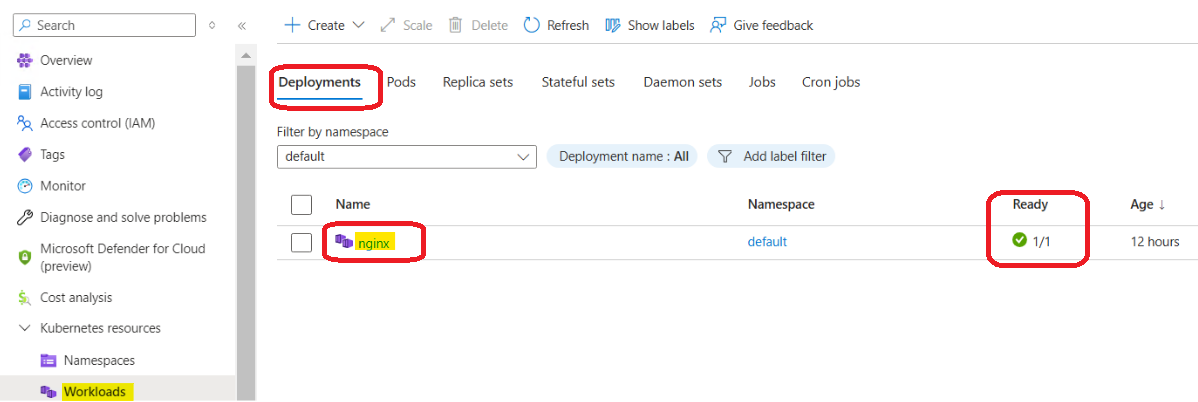
When successfully executed, we can able to view the deployment is created successfully as shown below.
We also ensure in Azure portal by viewing pod will be created as shown below images under default namespace.
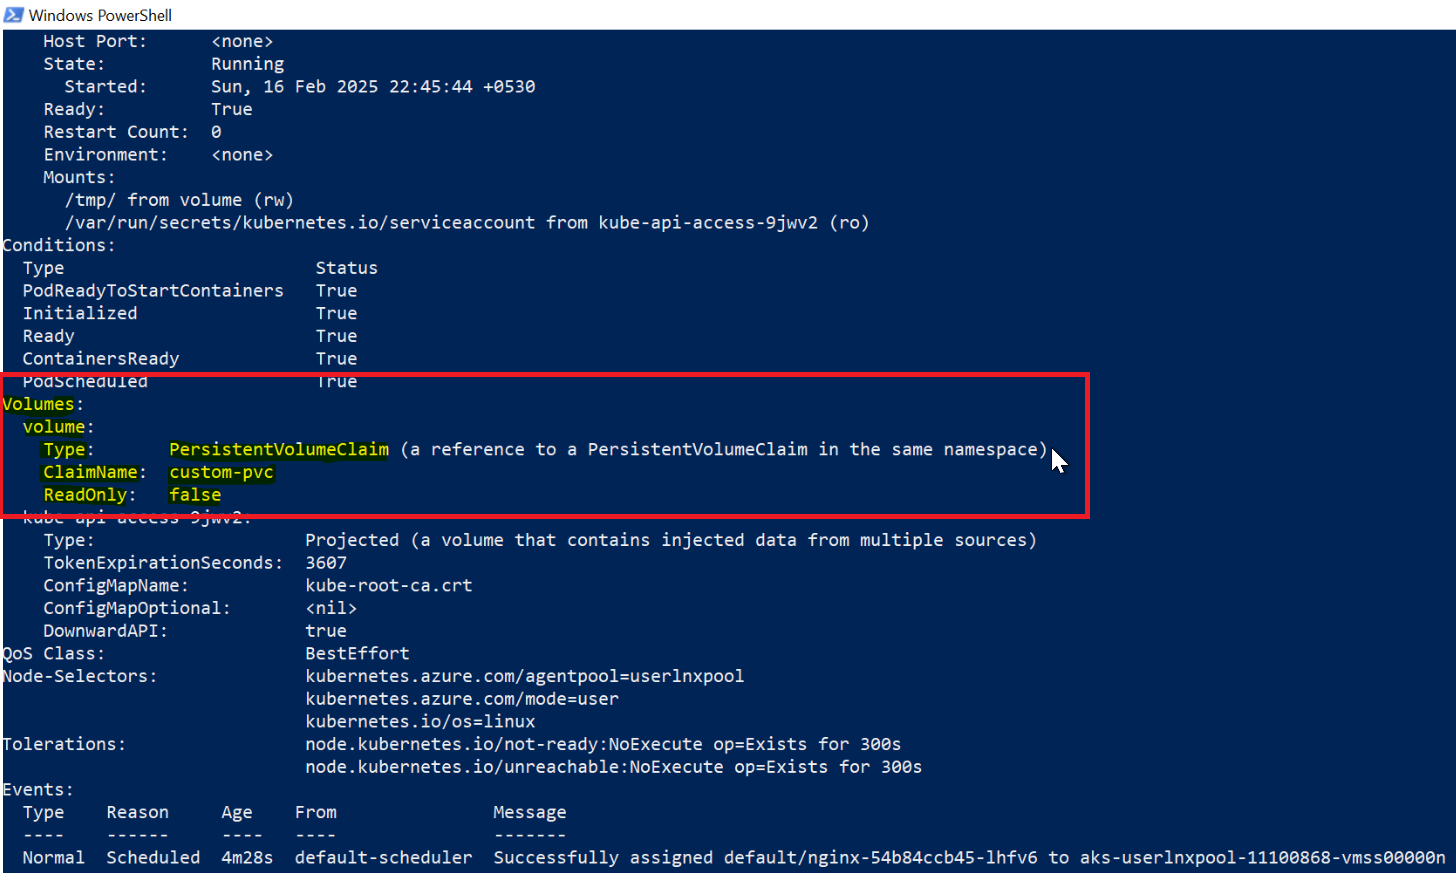
3. Verify that the persistent volume is attached to the pod
kubectl describe pod nginx
The PVC will request for an Azure disk of 10 GB with access mode as ReadWriteOnce. That means only one node can mount the volume as read-write.
You can see that the volume is listed and and uses the claim name “custom-pv.”
Check Volume mount in your pod
To connect to the running Azure container instance, use the following command and run the df command to view the volumes:
kubectl exec -it <pod-name> -n <namespace> -- /bin/bash
kubectl exec -it nginx-7466c47dd6-h9tvz -n default -- /bin/bash
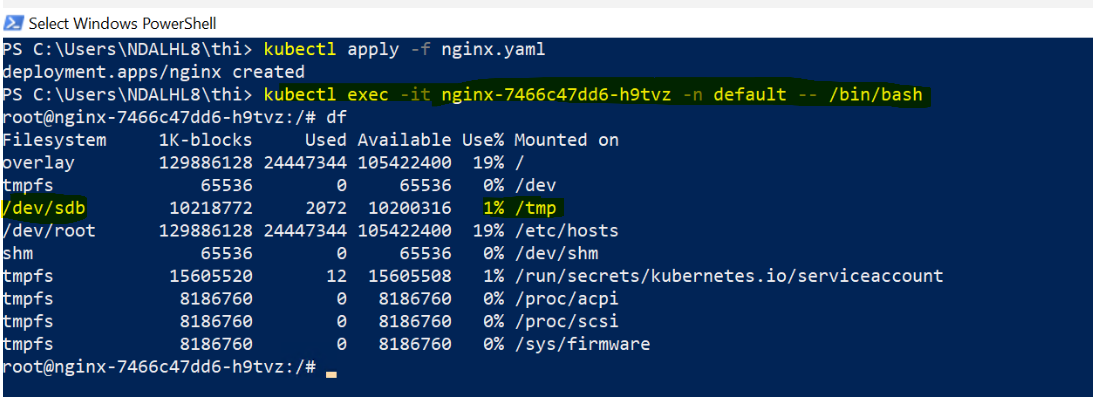
/dev/sdb : >> This indicates the device file associated with the storage. In this case, /dev/sdb refers to the second SCSI disk on the system.]
1K-blocks: 10218772 >>This shows the total size of the filesystem in 1-kilobyte blocks. Here, it amounts to approximately 10,218,772 KB, or roughly 9.75 GB.
Use%: 1% >> This shows the percentage of the filesystem’s capacity that is currently used. In this case, only 1% of the space is utilized.
Mounted on: /tmp >>This specifies the mount point, which is the directory where the filesystem is attached to the system. Here, the device /dev/sdb is mounted on /tmp, the standard directory for temporary files in Unix-like systems.