
Contents
Introduction
Monitoring DNS resolution inside Azure Kubernetes Service (AKS) is essential for maintaining reliable application connectivity. When DNS failures occur, services can experience intermittent connectivity or complete outages. One effective way to diagnose these issues is by using tcpdump with CoreDNS — the DNS server used by AKS.
In this guide, you’ll learn how to configure tcpdump within your CoreDNS deployment to capture and analyze DNS request/response traffic in real time
Prerequisites:
- You need kubectl configured and connected to your AKS cluster.
- Ensure you have permissions to manage deployments and pods in your Kubernetes cluster.
Step-by-Step Guide to Configure tcpdump to Find DNS failures
Step 1: Identify the CoreDNS Deployment
First, you need to find the CoreDNS deployment in your Kubernetes cluster: Look for a deployment named coredns in the kube-system namespace.
kubectl get deployments -n kube-system
Look for a deployment named coredns in the kube-system namespace.
Step 2 : Backup the coredns to Local
As a precautionary measure, create a local backup of your CoreDNS deployment YAML file before making any changes. You can achieve this using the following command:
kubectl get deployment coredns -n kube-system -o yaml > coredns.yaml
Step 3 : Add tcpdump Container to CoreDNS Deployment
Method 1: Edit the CoreDNS Deployment
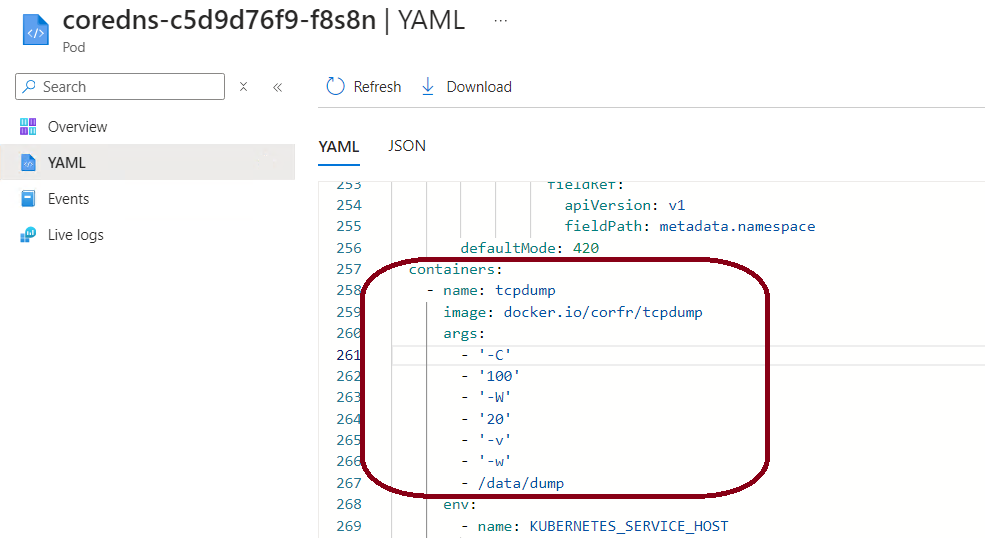
Edit the coredns deployment and add the tcpdump container under the spec.template.spec.containers section of the CoreDNS deployment YAML. Here’s an example of how you can add it and save:
spec:
template:
spec:
containers:
- name: tcpdump
image: docker.io/corfr/tcpdump
args: ["-C", "100", "-W", "20", "-v", "-w", "/data/dump" ]
When you use tcpdump to capture packets, it writes them into a file (like dump00.pcap). If you keep capturing for a long time, that file can grow very large — potentially filling up the pod’s disk.
1️⃣ -C <file_size> — Limit the size of each capture file
This flag sets the maximum size (in megabytes) of a single capture file.
🔹 Example:
-C 100
→ Each.pcapfile will be limited to 100 MB.
Once the file reaches 100 MB, tcpdump automatically starts a new file.
2️⃣ -W <file_count> — Limit how many files to keep
This flag sets the number of rotated files tcpdump should keep.
🔹 Example:
-W 20
→ tcpdump will keep 20 files maximum, rotating them like a circular buffer.
When it reaches the 21st file, it overwrites the oldest file.
Method 2: patch the deployment
Create patch.yaml file with above spec content and save to local and execute using below kubectl.
kubectl patch deployment coredns -n kube-system –patch-file patch.yaml
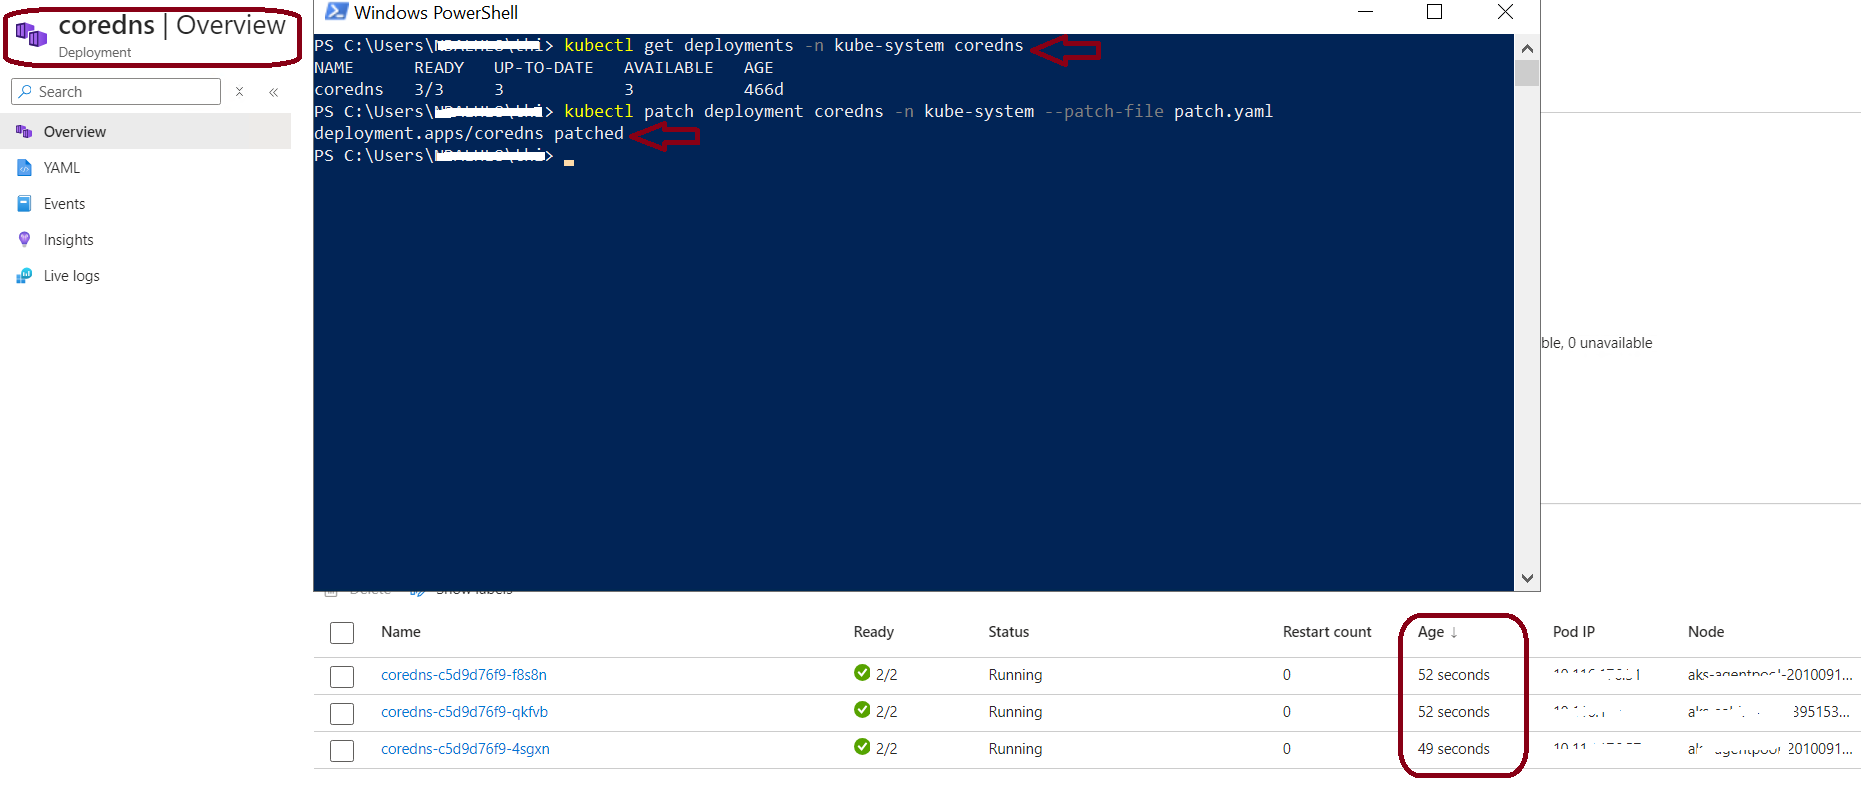
Post either followed Method 1 or 2, This changes will apply and trigger a rollout of the CoreDNS deployment.
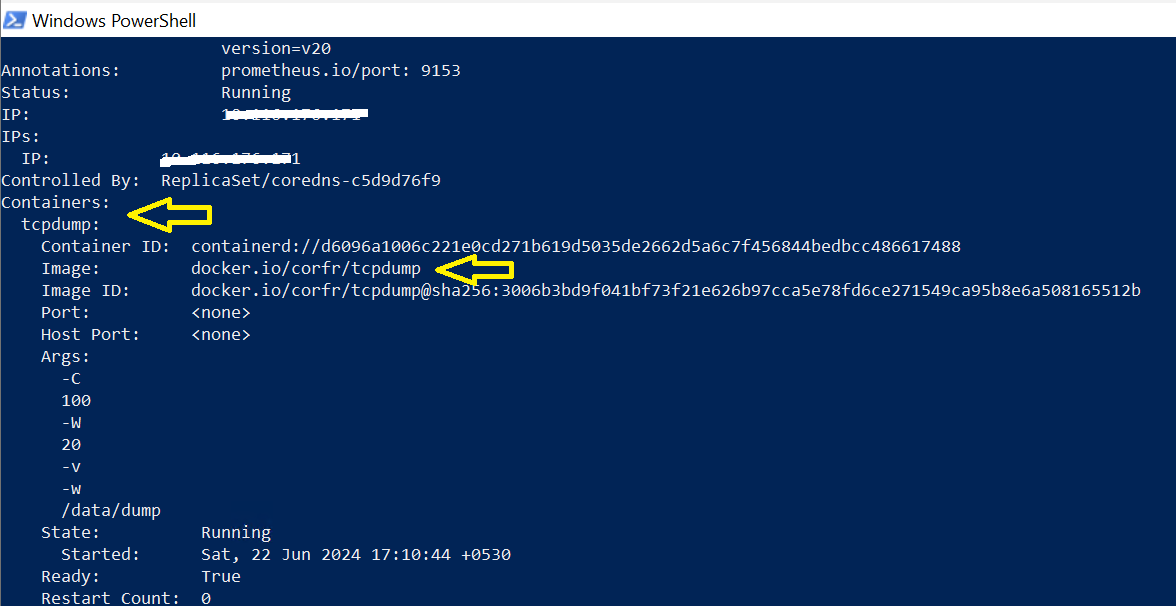
Step 4 : Check the tcpdump container status
Once the rollout is complete, use the following command to check if the tcpdump container is running within a coredns pod: The output should display the tcpdump container listed among the containers running within the pod.
kubectl describe pod coredns -n kube-system
Step 5 : Verify the dump
Access the core dns pod using the following command, replacing <coredns-pod-name> with the actual pod name:
kubectl exec -it <coredns-pod-name> -n kube-system -c tcpdump — sh
Once inside the pod, navigate to the /data directory to view the captured packets. You should find a file named “dump00” containing the captured network traffic data.
ls /data
There should be a dump00 file present.

Step 6: Downloading Logs from coredns
At this point we wait for a few occurrences of the issue. Not sure how long this will take, that would depend on how often you see the error which you expect to collect in dumps. Once enough data is collected, you can exec into each of the pods and rename the file to apply the proper extension and then copy it to your local directory.
After enter in to the coredns pod, execute the below cmd ( you can able to see more dumps like dump00 , dump01, dump01….) to rename all the dump files as you required (XX replace with the your own name). Ensure you executing this command after moving to /data directory. Repeat this step, based on how much dump file present inside the coredns pod.
mv dump00 dumpXX.pcap
Finally exit the pod and in powershell/cmd, you can start to download from coredns to you local
kubectl cp kube-system/coredns-86c697cd8-6qtx9:/data/dump00.pcap -c tcpdump ./coredns-dump00
Step 7: Cleanup (Optional)
Remember to remove the tcpdump container from the CoreDNS deployment once you have completed your troubleshooting to avoid unnecessary resource usage and potential security risks. By restarting the coredns pods, the latest change will removed and back to its original state.
Conclusion
Configuring tcpdump on CoreDNS in AKS allows you to monitor DNS traffic effectively for troubleshooting and analysis purposes. By integrating tcpdump with CoreDNS, you can observe real DNS traffic patterns and isolate failures within your AKS cluster. This approach is invaluable for diagnosing name resolution issues that affect microservice communication or external dependencies. Use it in a controlled manner, and remove the tcpdump container once troubleshooting is complete.
Notes
- Security: Exercise caution with tcpdump as it can capture sensitive information. Ensure appropriate access controls and secure practices are in place.
- Performance: Running tcpdump may impact pod performance and network throughput. Use it judiciously, especially in production environments.
- Logging and Monitoring: Consider integrating tcpdump logs with your existing logging and monitoring solutions for better visibility and analysis.