Today, I will be taking about a technique using which you can view the secret variables in Azure DevOps.
Introduction
Azure DevOps supports us to store secrets within Azure DevOps variable Groups which could be used with the Pipelines. These secret variables couldn’t be viewed by us manually from the portal. Sometimes, we may want to view the password to perform some other activities.
Note: The best practice to have the secrets in Azure Key Vault and same you can read and execute in Azure pipeline in very secured way. Still some legacy projects are maintaining the secrets in Azure Variable group, so this article focus on them. You can read this to use Key Vault to handle the secrets
What are Secrets Variables in Azure Pipelines?
Secret Variables are placeholders for values which you want to store in an encrypted format and use while using running a pipeline. Secret Variables can be used for values like username, password, API key etc. Secret variables are encrypted variables that you can use in pipelines without exposing their value. Secret variables can be used for private information like passwords, IDs, and other identifying data that you wouldn’t want to have exposed in a pipeline. Secret variables are encrypted at rest with a 2048-bit RSA key and are available on the agent for tasks and scripts to use.
How to set Secret in Azure Variable group?
Set secret variables in the UI for a pipeline. Secret variables set in the pipeline settings UI for a pipeline are scoped to the pipeline where they are set. So, you can have secrets that only visible to users with access to that pipeline. Set secrets in a variable group. Variable groups follow the library security model. You can control who can define new items in a library, and who can use an existing item.
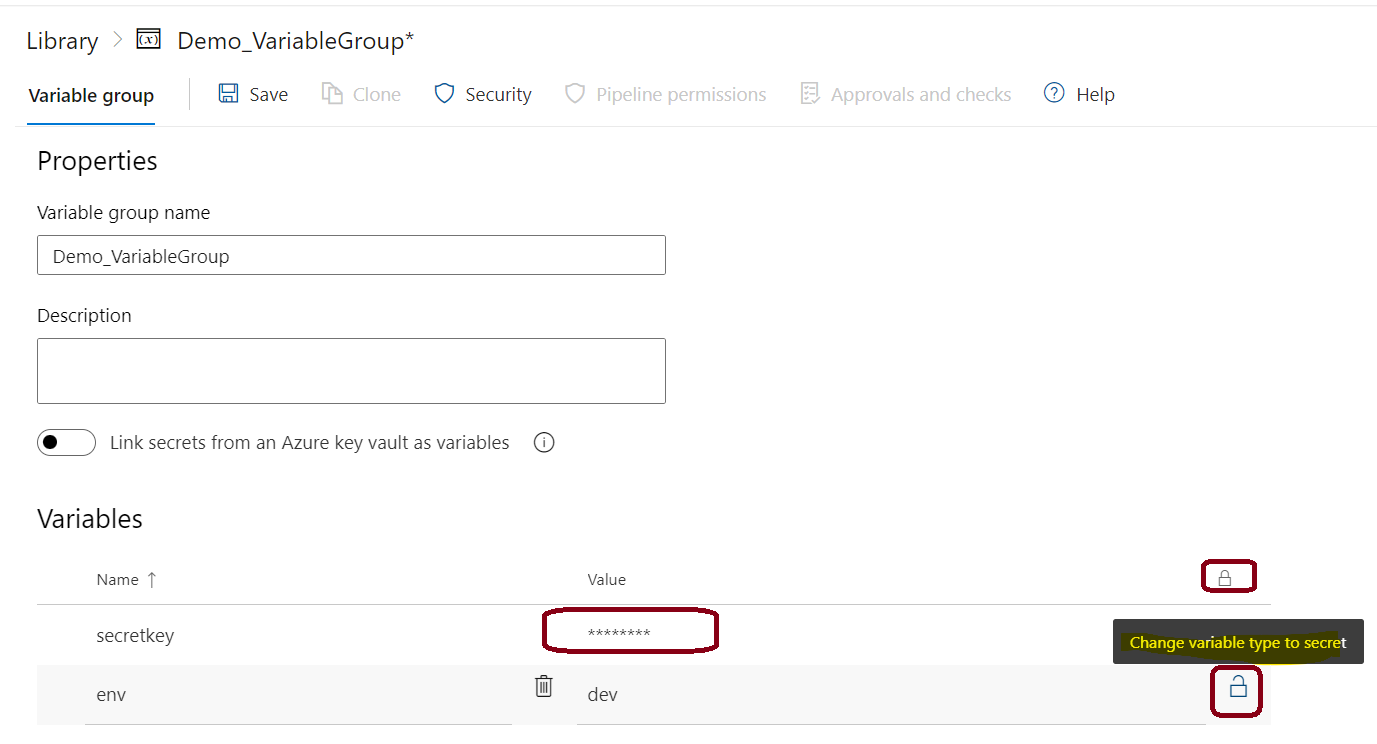
Let’s create a Secret variable in a Variable Group as shown below and make sure that you set it as a secret by locking it.
Once you mark it a secret (by clicking on the open lock icon as shown in below image), save the Variable Group, no one including admin will be able to view the secret. Let’s now understand how to view the secret with the help of Azure DevOps – Pipelines.
View the secret variables from Variable Group
You can create a simple Pipeline which has the below tasks to view the secrets in pipeline execution.
- PowerShell task which outputs a text (along with secret) into a file names ViewSecretValue.Txt
- Publish the ViewSecretValue.txt into Azure Pipeline artifacts.
Run the pipeline with with below PowerShell task
variables:
- group: Demo_VariableGroup
steps:
- powershell: |
    "The secretkey value is : $(secretkey)" | Out-File -FilePath  $(Build.ArtifactStagingDirectory)\ViewSecretValue.txt
- task: PublishBuildArtifacts@1
  inputs:
    PathtoPublish: '$(Build.ArtifactStagingDirectory)'
    ArtifactName: 'drop'
    publishLocation: 'Container'
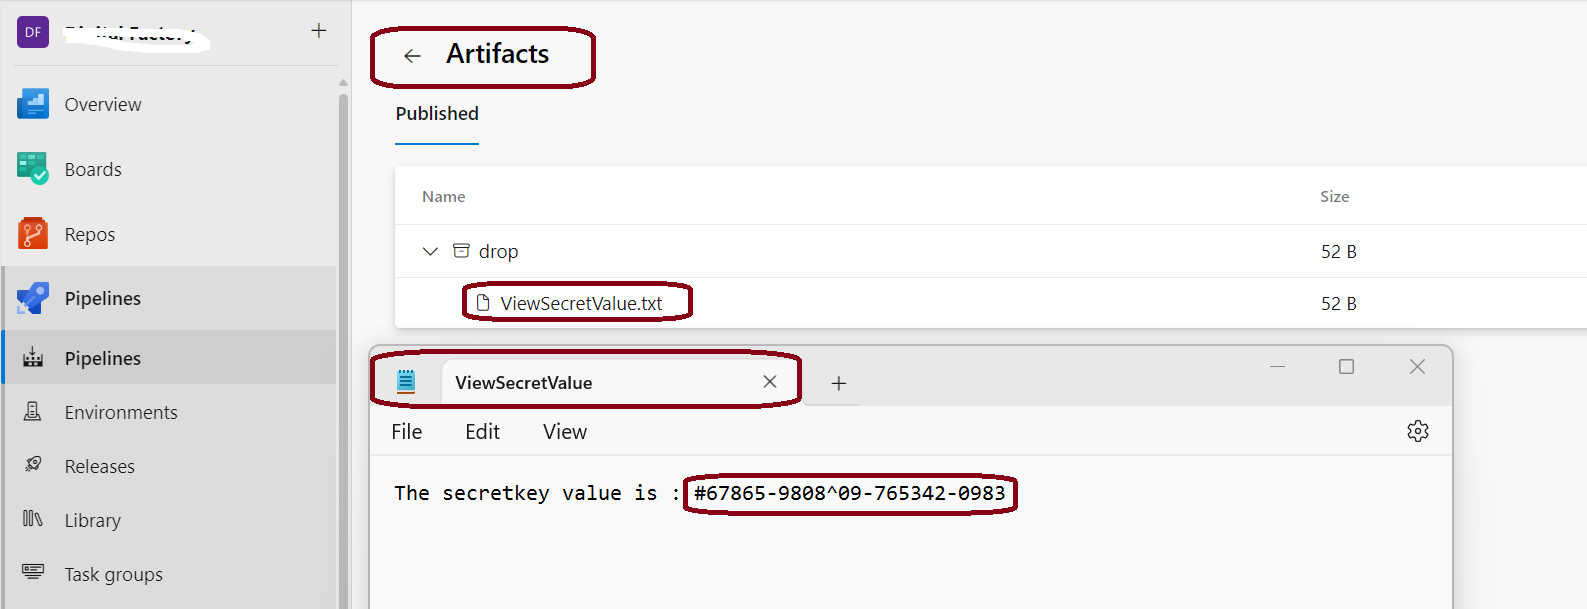
Now, click on the ViewSecretValue.txt file to download the file. Once you download it, view that in a Notepad which should below.
Conclusion
In summary, handling secret variables securely is crucial for maintaining data confidentiality in DevOps processes. Azure DevOps provides built-in features and best practices to keep sensitive data protected, making it a powerful platform for secure CI/CD pipeline management. Integrating with tools like Azure Key Vault can further strengthen your security posture and simplify secret management across multiple projects.