Docker has revolutionized how developers build, ship, and run applications by simplifying dependency management and environment consistency. At the core of Docker’s workflow is the Dockerfile, a script that defines how to assemble a container image. This article walks you through Create Docker Image from a local Docker file, deploying it as a container, and understanding real-world use cases. Whether you’re new to Docker or refining your skills, this guide offers practical steps to streamline your workflow.
Contents
Why use a Dockerfile?
A Dockerfile is a simple text file containing a series of commands and instructions used to build a Docker image. It’s the blueprint for your image, automating the creation process so that your app’s environment can be replicated anywhere. A Dockerfile automates the creation of Docker images, ensuring repeatability across environments. Instead of manually configuring containers, you define instructions (e.g., installing dependencies, copying files) in the Dockerfile. This approach eliminates “it works on my machine” issues and speeds up deployment.
Dockerfile commands have a wide range of purposes. Use them to:
- Install application dependencies.
- Specify the container environment.
- Set up application directories.
- Define runtime configuration.
- Provide image metadata.
Prerequisites
- Command-line access.
- Administrative privileges on the system.
- Docker installed.
Create Docker Image from Dockerfile
Follow the steps below to create a Dockerfile, build the image, and test it with Docker.
Step 1: Create Project Directory
Creating a Docker image with Dockerfile requires setting up a project directory. The directory contains the Dockerfile and stores all other files involved in building the image.
To make simple, you can create required docker file inside the project directory as shown below.
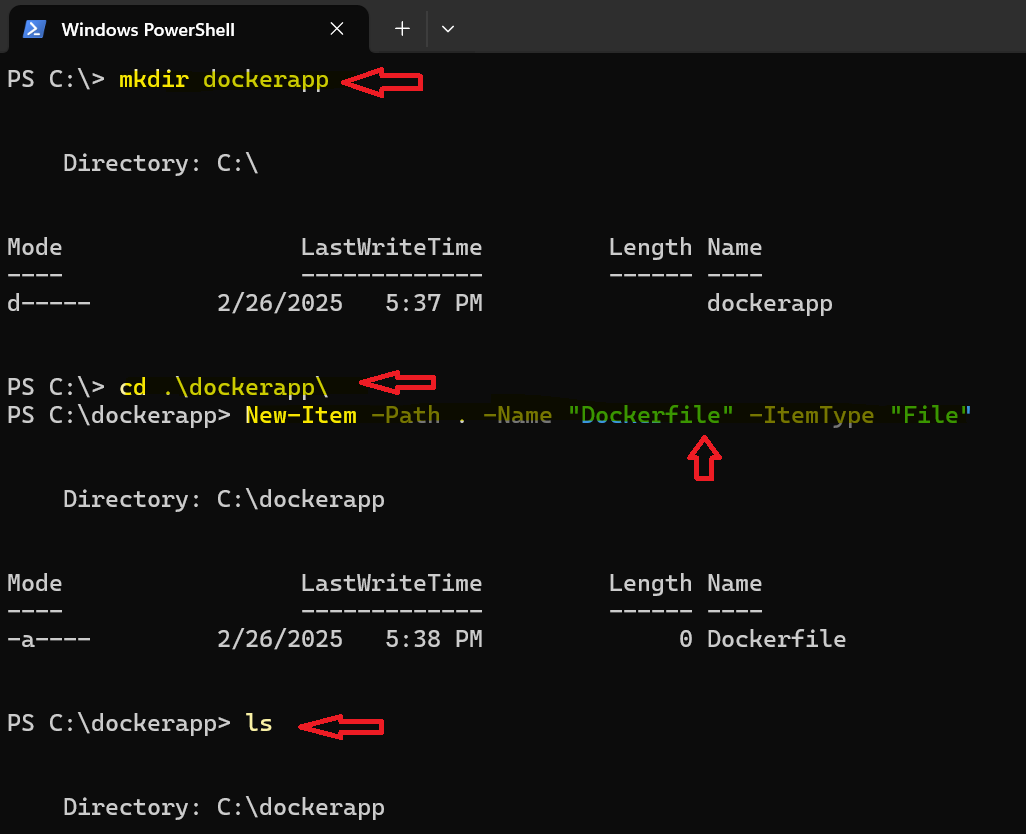
Create a directory by opening the Terminal and using the mkdir command, for this example i used powershell
|
1 2 3 |
mkdir dockerapp |
Replace <directory> with the name of the project.
Step 2: Create Dockerfile
The contents of a Dockerfile depend on the image that it describes. The section below explains how to create a Dockerfile and provides a simple example to illustrate the procedure:
1. Navigate to the project directory:
|
1 2 3 |
cd <directory> |
2. Create a Dockerfile using a text editor of your choice. Here i created using PowerShell cmdlet as shown below else you can create file manually inside your directory
|
1 2 3 |
New-Item -Path . -Name "Dockerfile" -ItemType "File" |
3. Add the instructions for image building. For example, the code below creates a simple Docker image that uses Ubuntu as a base, runs the apt command to update the repositories, and executes an echo command that prints the words Hello World in the output: Please place this docker file command inside the file which we create in above step.
|
1 2 3 4 5 6 |
FROM ubuntu MAINTAINER test-user RUN apt update CMD ["echo", "Hello World"] |
Once you finish adding commands to the Dockerfile, save the file and exit.
Note: After running of the above image, you will have “Hello World” as output (refer the last image of this article).
| Syntax | Description |
|---|---|
| FROM <image> | Specifies an existing image as a base. |
| MAINTAINER <name> | Defines the image maintainer. |
| RUN <command> | Executes commands at build time. |
| CMD <command> <argument> | Sets the default executable. |
| ENTRYPOINT <command> | Defines a mandatory command. |
| LABEL <key>=<value> | Adds metadata to the image. |
| ENV <key>=<value> | Sets environment variables. |
| ARG <key>[=<default-value>] | Defines build-time variables. |
| COPY <source> <destination> | Copies files into the image. |
Step 3: Build Docker Image
Use the following procedure to create a Docker image using the Dockerfile created in the previous step.
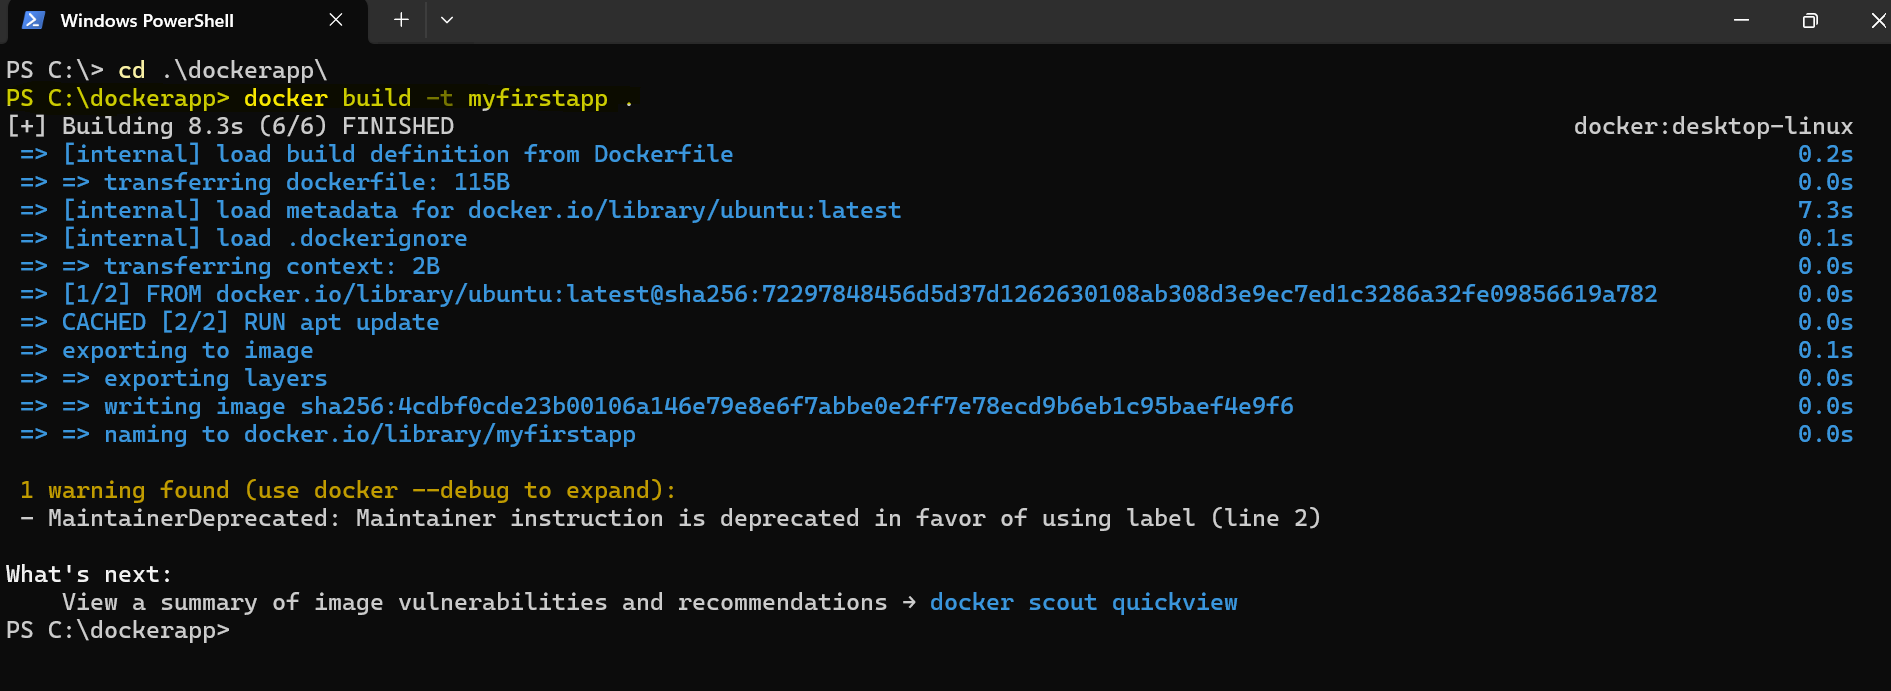
1. Run the following command to build a docker image, replacing <image> with an image name and <path> with the path to Dockerfile:
|
1 2 3 |
docker build -t <image> <path> |
The -t option allows the user to provide a name and (optionally) a tag for the new image. When executing the command from within the project directory, use (.) as the path:
|
1 2 3 |
docker build -t <image> . |
Docker reads the Dockerfile’s contents and executes the commands in steps as shown in below snap shot.
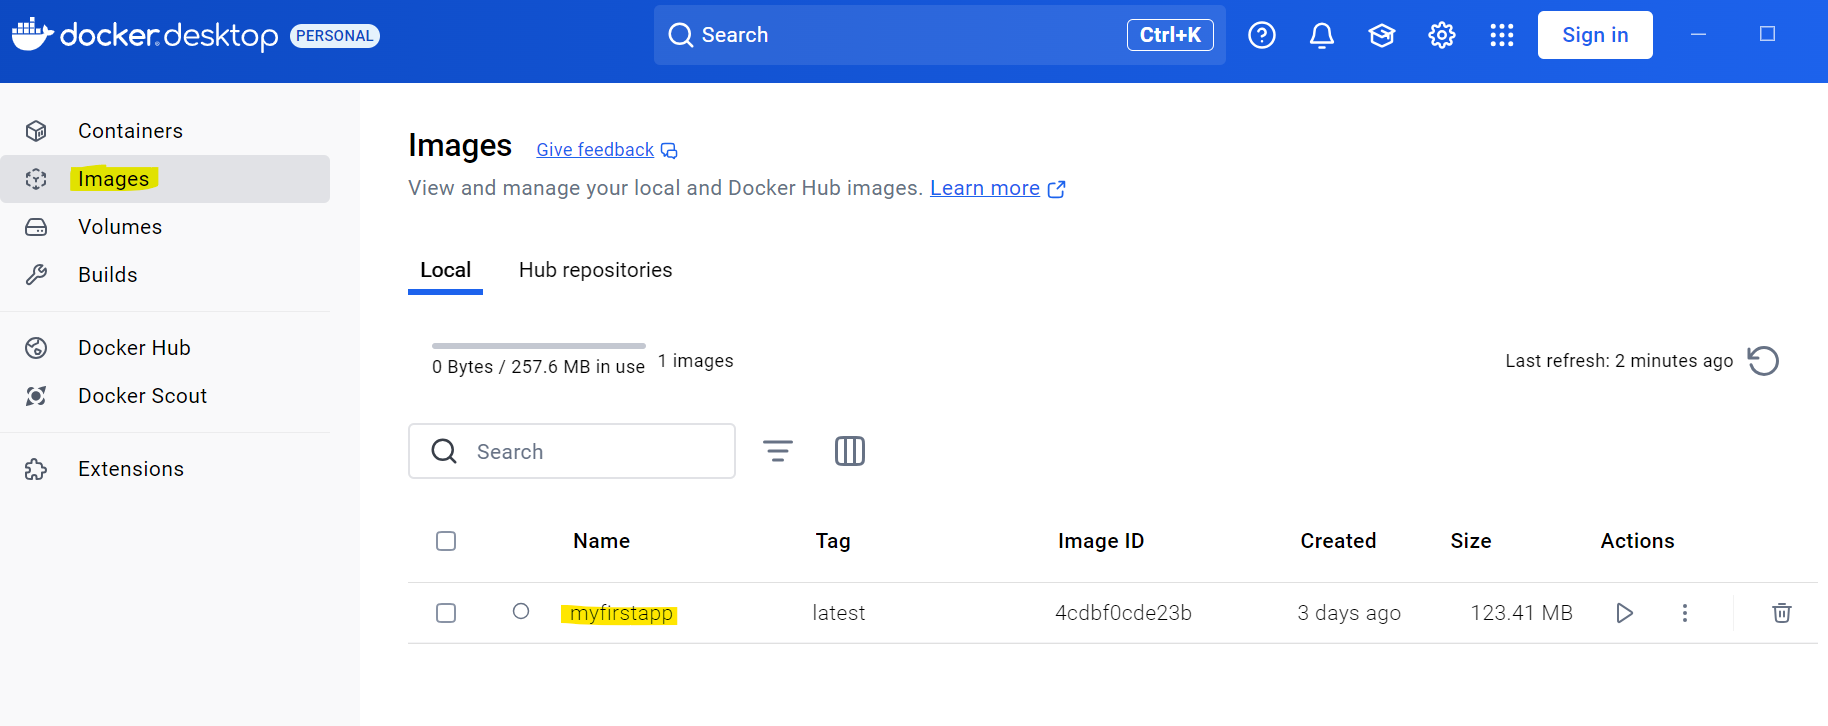
2. Verify that the new image is in the list of local images by entering the following command or you can check inside the docker dashboard as shown below.
|
1 2 3 |
docker images |
The output shows the list of locally available images.
Step 4: Test Docker Image
To test the new image, use docker run to launch a new Docker container based on it: Ensure the container need to attach to run the docker image.
|
1 2 3 |
docker run --name <container> <image> |
The example below uses the myfirstapp image to create a new container named myfirstappcontainer:
|
1 2 3 |
docker run --name myfirstappcontainer myfirstapp |
Docker creates a container and successfully executes the command listed in the image’s Dockerfile.
Conclusion:
Understanding Docker’s core commands, such as docker run --name, is essential for efficiently managing containers. The example provided (docker run --name myfirstappcontainer myfirstapp) illustrates how to launch a container directly tied to a specific image, ensuring the execution of predefined Dockerfile instructions.
This approach streamlines development and deployment by enforcing container-image linkage at runtime. The article reinforces the importance of Docker in modern DevOps practices, offering actionable insights for creating images, handling containers, and integrating these tools into broader development workflows. By mastering these concepts, developers can enhance reproducibility, scalability, and automation in their projects.


Leave A Comment