Namespace are a foundational concept in Kubernetes that enable logical isolation of resources within a cluster. They allow teams, projects, or environments (e.g., dev, staging, prod) to share the same cluster without interfering with each other. By default, Kubernetes includes system namespaces like default, kube-system, and kube-public, but creating custom namespaces is essential for organizing workloads securely and efficiently. This article explains how to create, manage, and use custom namespaces using kubectl, with detailed examples and best practices.
Contents
What Is Kubernetes Namespace?
By using Namespaces, you can separate your cluster into different groups that are isolated from one another. For instance, you can create two separate Namespaces for an application — one for development and one for production. The development Namespace can be used for testing, debugging, and experimentation purposes, while the production Namespace can be used for hosting the stable and publicly accessible version of the application.
When you create a Namespace, any Kubernetes objects such as Pods, Deployments, and DaemonSets that you launch in it will exist exclusively within that Namespace. More importantly, all operations you perform, such as scaling and deleting resources, will only affect the objects in that specific Namespace.
Why Use Kubernetes Namespace?
Imagine a cluster hosting hundreds of applications, each with its own Deployments, ConfigMaps, and Secrets. Without Namespaces, managing these resources becomes chaotic:
Risk of Accidental Changes: Modifying or deleting the wrong resource is easy.
Lack of Visibility: Resources from different teams or projects clutter the same space.
Shared Resource Limits: A single team could monopolize cluster resources.
Namespaces solve these issues by:
- Grouping Resources: Organize resources by team (e.g., frontend, backend), environment (dev, prod), or function (monitoring, logging).
- Enforcing Policies: Apply Role-Based Access Control (RBAC) and resource quotas per Namespace.
- Simplifying Management: Isolate troubleshooting and operations to specific contexts.
Prerequisites
Before creating a Namespace, ensure you have:
- A Running Kubernetes Cluster or mini kube for local setups.
- kubectl Installed: Configured to communicate with your cluster.
All commands in this guide are tested on Azure Kubernetes cluster
How to Create a Custom Kubernetes Namespace?
With the prerequisites taken care of, creating a custom Namespace in Kubernetes is a simple process. Here’s how you can do it:
Step 1: Check available Namespaces
Open a terminal and run the following command to list all the Namespaces in your cluster:
|
1 2 3 |
kubectl get namespaces |
This will list all the Namespaces in your cluster, along with their status and age:
You will see a list of Namespaces shown in the console. Note that the Namespaces you’ll see besides the “default” Namespace will vary depending on your cluster configuration. For example, if you run the “kubectl get namespaces” command on a Kubernetes cluster, you’ll get the following output:
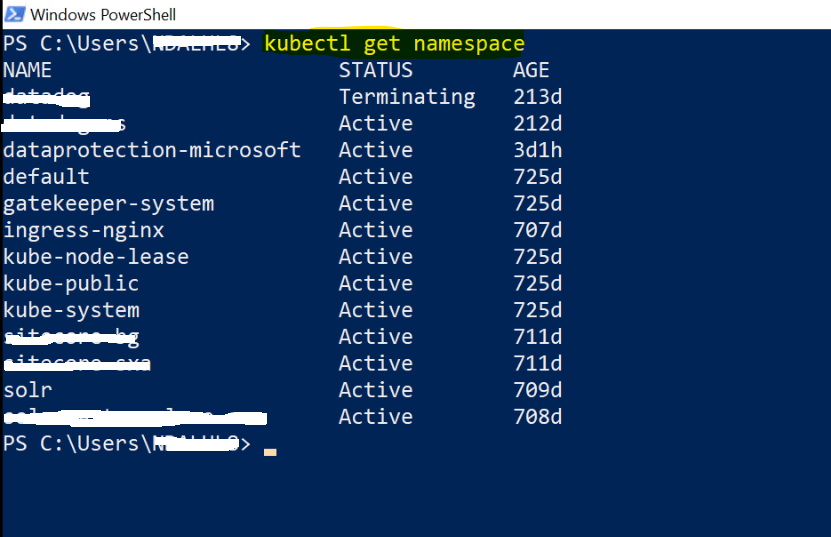
You may notice that in addition to the “default” Namespace, some Namespaces appear in both outputs while others are unique to each one. These additional Namespaces are not relevant to our discussion, so you can ignore them. However, understanding the “default” Namespace is important.
By default, all Kubernetes resources are created in the “default” Namespace if no Namespace is specified. The “default” Namespace is created automatically when Kubernetes is installed.
Step 2: Create a Custom Namespace
Run the following command to create a new Kubernetes Namespace called “production”. You can name your Namespace anything you like.
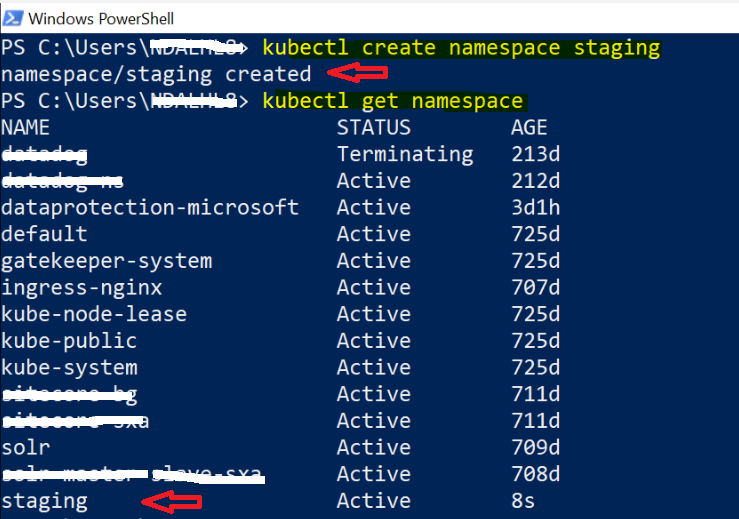
The output shows that the “staging” Namespace has been created successfully. We can verify this by executing the “kubectl get namespaces” command. As you can see, the new Namespace named “staging” is now listed along with the other Namespaces in the cluster. We can now use this Namespace to deploy applications related to lower environment and manage resources.
How to Create a Deployment in a Custom Namespace?
In the previous section, we created a custom Namespace named “staging”.
Now, let we create a Deployment that runs an “nginx” web server inside this Namespace. We can use the “kubectl create deployment” command for creating deployment. However, we need to specify the Namespace using the “-n” or “–namespace” flag, as shown below. Else it will create the deployment in the default namespace.
In this command, we have specified the “nginx” image and the “staging” Namespace using the “-n” flag. We have also given the deployment the name “mynginx”.
|
1 2 3 |
kubectl create deployment mynginx --image=nginx -n=production |
The output shows that the deployment has been created successfully and you can check the status of the deployment using kubectl get cmdlet with the “-n” flag to list the Deployments in the “production” Namespace.
|
1 2 3 |
kubectl get deployment -n staging |
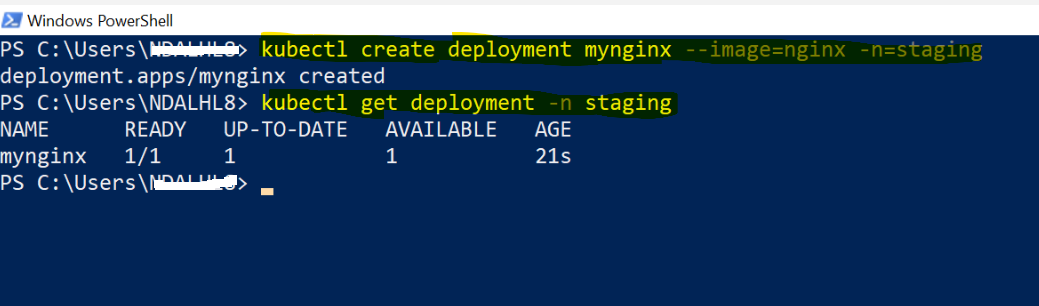
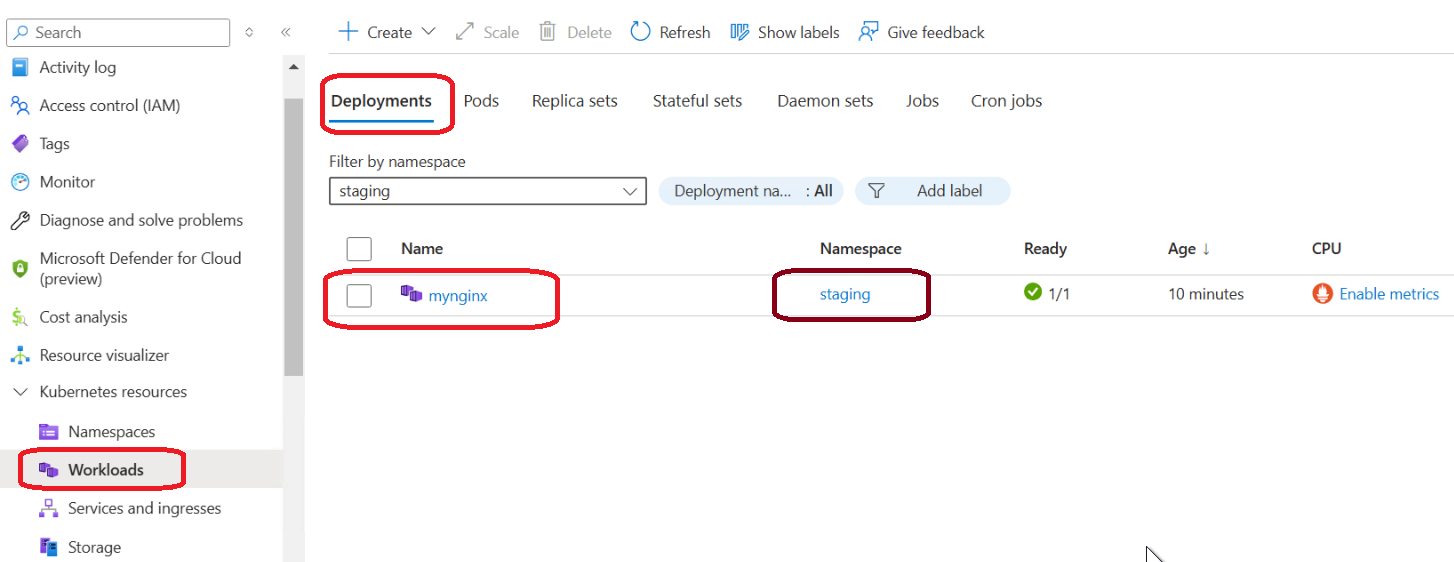
As you can see, the “mynginx” Deployment is now running inside the “production” Namespace.
How to Delete a Custom Kubernetes Namespace?
In above steps, we have created a custom Namespace called “staging”, let’s see how we can delete it.
Deleting a Namespace is a simple operation in Kubernetes but we need to more careful before doing this action as it will delete all the resources like deployment/pods will get deleted. We can use the “kubectl delete namespace” command followed by the name of the Namespace we want to delete. Run the following command to delete the “staging” Namespace:
Deleting a namespace removes all resources within it, including Pods, Deployments, ConfigMaps, and Services. Use this command with caution.
|
1 2 3 |
kubectl delete namespace staging |
Here is the output we get after executing the command:

To verify that the “staging” Namespace has been successfully deleted, we can list the available Namespaces in our cluster using the kubectl get namespace command as shown in above step (Step 1: Check available Namespaces):
What Happens When You Delete the Namespace in Kubernetes?
Remember that deleting a Namespace also deletes all the resources created inside it. In our case, we had created a Deployment called “mynginx” inside the “staging” Namespace. Now that we have deleted this Namespace, we have also deleted this “mynginx” Deployment.
Remember to be careful when deleting Namespaces, as it can result in the loss of important resources. Always double-check before performing such operations.
- Cascade Deletion: Kubernetes terminates all resources inside the namespace.
- Pods are gracefully shut down.
- PersistentVolumes (if not retained) are deleted.
- Services, Deployments, and Secrets are removed.
- Irreversible Action: Once deleted, resources cannot be recovered unless backed up externally.
- Finalizers: Some resources may delay deletion if they have finalizers (e.g., waiting for storage cleanup).
Summary
Deleting a namespace is a powerful but irreversible operation. Always verify resources inside the namespace, use dry-run simulations, and ensure backups exist. If a namespace gets stuck, manually removing finalizers can resolve the issue. By following these practices, you minimize the risk of accidental data loss in your Kubernetes cluster.
To limit CPU, memory, or Pod counts per namespace in Kubernetes, you can use Resource Quotas and Limit Ranges. Resource Quotas define hard limits for resource consumption within a namespace, while Limit Ranges enforce minimum and maximum resource constraints on individual Pods or containers. We will discuss more about this deep drive in upcoming article.
Leave A Comment