How to use MVC Areas feature using Razor
What is Areas ?
- In MVC we have default folders (view, model, controller…) structure, If application grew larger, then it will be complicated to maintain a modules and structure logic for the file in the solution.
- To overcome this, MVC provide areas,Using MVC area has its own folder structure which allow us to keep separate controllers, views, and models…
Creating Areas
Step 1:
To add an area to application, right-click on the project —> select Add —> Area option as shown below.
Step 2:
Enter the Module/Areas Name in the “Add name Prombt” as shown below
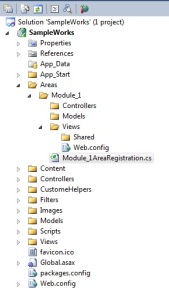
Click ADD button to create structure(Areas) as shown below
Same way we can create more areas based on our modules…
Step 3:
Create Controller by right clicking the controllers folder then create view , as shown in below
Step 4:
Here we start discuss about “How to call Module_1(Areas) from main project”.
Here i am creating actionlink for calling the view inside the Module_1
@Html.ActionLink(“Go to Module-1 Index”,”Index”,”Module_1″,new {area =”Module_1″},null)
- “Go to Module-1 Index” : Name of link
- Index : Name of the Action
- Module_1 : Name of the controller
- new {area =”Module_1″} : Name of the area
Step 5 : Run the Application
OUTPUT :
By clicking the link, it will redirect to Module_1 (inside the Areas) as shown below


Leave A Comment